Big trips feel better when small problems stay home. An RV has many systems, power, water, propane, and moving parts, and each one can quietly fail while the rig sits. A quick walk and a few smart checks can really save a weekend. This guide keeps the language simple and the steps doable, even if you are new to RVs. You will see where issues hide, what tools help, and how to decide when to call a pro. No scare tactics here; clear tips you can use today. Before you pack, review seven spots that cause delays. Fixing one loose connection or worn seal now beats waiting on the shoulder later. Let’s get your rig set and your trip smooth.
1. Battery And Charging Problems That Stall Trips
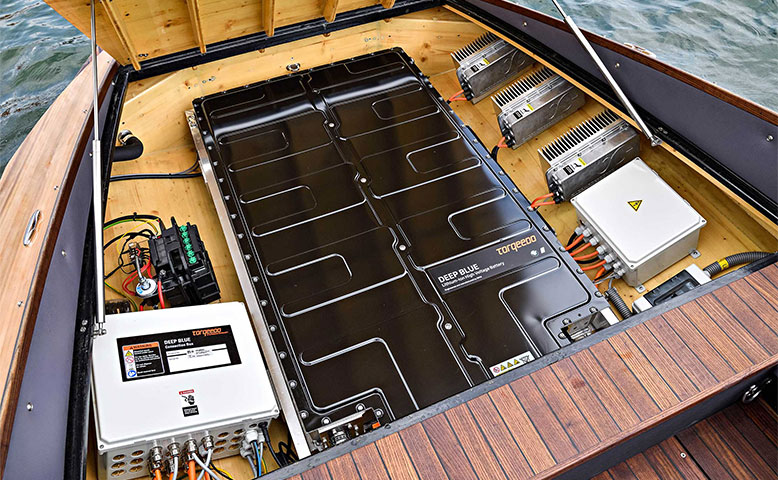
Your RV can look ready from the outside, yet a weak battery makes the first night rough. Start by checking the battery disconnect switch, then look for loose or corroded cable ends. A digital multimeter is the best quick tool: test at the battery posts, then test again at the fuse block. If those two readings are not close, you may have a tired cable, a bad ground, or a failing connection. Plug into shore power and listen for your converter fan; some units are quiet, but total silence under load points to trouble. Think about parasitic draws, LP detectors, stereos, and trackers that sip power while the rig sits. Before you roll out, confirm your inverter powers the outlets you expect and that the GFCI reset buttons work.
- Clean and tighten battery terminals with simple tools.
- Test both shore power and generator charging.
- Match fuse amperage to the panel label.
- Keep a small jump pack for emergencies.
2. Roof Leaks, Seals, And Water Intrusion Checks
Water damage often starts as a stain that hides under the trim. Spend ten minutes on the roof with a soft-soled shoe. Check seams at vents, skylights, antennas, and the front and rear caps. Sealant should be flexible, not brittle or lifted. If you see gaps, clean the area and use a sealant rated for your roof material; rubber, fiberglass, and aluminum each use different products. From the inside, run your hand along upper cabinets and ceiling corners to feel for cool, damp spots. Look at the A/C unit as well; the rooftop gasket needs correct compression so rain does not sneak in when you drive. While you are there, inspect vent lids for cracks and replace broken lift arms.
- Keep a small tube of roof-safe sealant in your kit.
- Clear debris from gutters so runoff flows away.
- Log any stains with date and location for tracking.
3. Tires, Bearings, And Brakes That Need Attention
Tires carry the whole trip, so start there. Read the sidewalls for the load rating that matches your rig, and set the pressure to the value shown on the RV placard or trailer sticker. Look for sidewall cracks, cords, or uneven wear; any of those hints at aging rubber or alignment issues. Spin each trailer wheel and listen; gritty sounds or warmth after a short pull suggest bearings that need service. For motorhomes, watch for steering pull or a wobble that changes with speed. Check your brake controller gain at a low speed in a safe area, and confirm the breakaway switch engages the trailer brakes. Re-torque lug nuts to the value in your manual after a tire shop visit.
- Replace valve caps; they keep dirt out.
- Check the spare’s pressure and mount.
- Carry a jack, board, and wrench that fit.
4. Propane Systems, Detectors, And Safe Ventilation Basics
Propane runs the fridge on the road, heats water, and fuels the stove. Before a trip, open the compartment and look at the regulator, pigtails, and fittings for wear. A quick leak check uses soapy water on each joint; bubbles mean you should close the valve and get service. Make sure cylinders are upright and strapped, and confirm the valve opens and closes smoothly. Inside, test both the LP gas detector and the carbon monoxide detector using their buttons; replace batteries where required. If a burner flame is yellow, noisy, or lifts off the port, shut it down and have a pro adjust it. Good airflow matters when burning fuel: crack a roof vent or window as your manual suggests, and keep louvers clear of dust.
- Never store loose items near the regulator.
- Keep spare O-rings for quick hose swaps.
- Know the shutoff valve location you can reach fast.
5. Slide-Outs and Awnings That Misbehave Under Load
Slides and awnings are great until they stick. Before leaving, extend each slide several inches, listen, and watch. Stop if you hear binding, then check the sweep seals for folds or debris. A dry, RV-safe lube on gears or rails (where allowed by the maker) reduces drag and squeaks. Verify the slide switch holds a steady run without flicker; hesitation can point to low voltage or a weak motor. For awnings, look at the fabric for tears near the rail, and confirm the arms lock and unlock cleanly. Practice the manual retraction steps once at home so a windy surprise does not turn into a roadside puzzle. Stow awnings during gusts; the safest setting is rolled up when the weather turns.
- Brush leaves and grit from slide toppers.
- Keep a spare pull strap and cotter pins.
- Pack a small step stool for quick inspections.
6. Fresh, Gray, And Black Tank Care Essentials
Healthy tanks keep trips easy. Fill the fresh tank partway and run the pump; it should build pressure and stop smoothly. Open each faucet briefly to clear air and watch for leaks under sinks. Make sure the water heater is filled before turning it on, and check the bypass valves match your season setup. Tank sensors often read odd, so do not chase a single stuck light; steady rinse cycles work better than guesswork. Use a backflush fitting or a tank wand when parked to move residue, and always keep a small amount of water in the black tank before travel. Outside, look at the sewer hose, caps, and fittings for cracks.
- Keep the roof vents clear so tanks breathe.
- Close the black valve until dumping day.
- Carry disposable gloves and enzyme-safe treatments.
7. Electrical, Inverters, And Breakers Under Real Use
Small electrical issues show up only when loads run. With shore power connected, press the test and reset buttons on all GFCI outlets. Turn on a high-draw device like the microwave and watch for dim lights or breaker trips. That simple test tells you a lot about the health of your converter, wiring, and outlets. Check the main cord ends for heat after an hour; warmth hints at loose blades or a tired adapter. If you use a dogbone to step between 50, 30, or 15 amps, inspect it for scorch marks and strain. On inverter-powered outlets, try a laptop charger and a small tool to confirm the waveform plays well with electronics. A basic polarity tester for outlets can catch a miswired pedestal before it harms your gear.
- Label circuits at the breaker box.
- Coil cords loosely; avoid sharp bends.
- Store one spare GFCI outlet in your kit.
Wrap-Up
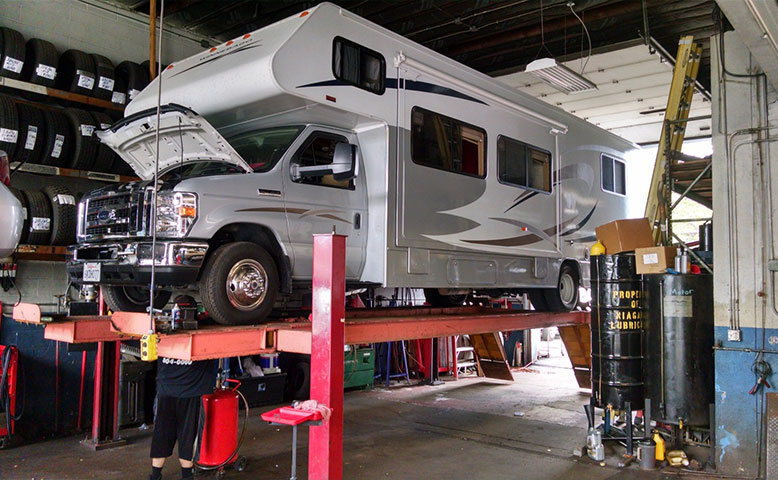
Small checks catch big delays. Give your rig a quiet hour, follow the steps above, and note anything that needs a pro’s eye. If a task feels beyond your tools or comfort, that is a smart flag to get help before the trip clock starts. Just N Case Auto Marine & RV offers auto repair, RV repair, boat repair, trailer repairs, and truck repairs. When your list grows, consider booking a quick inspection so your next getaway starts with smooth roads, not surprises.